Team
Summary: Teams let you organize generated content, collaborate with members, and manage shared folders within XBRUSH. Each team has its own member roles, billing, and content library.
Team Menu
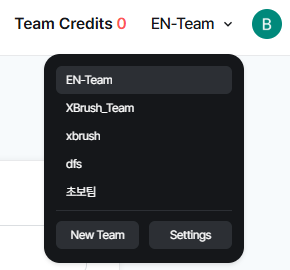
The team selector in the left control panel of the Workspace screen.
The team panel appears at the top of the left control panel on the Workspace screen. From here you can:
- Switch between your teams by clicking the team name.
- Create folders within the selected team to organize generated images.
- Drag generated images from the right side of the screen into a specific folder.
- Select a team to view all images generated by that team; select a folder to filter to images saved in that folder.
- Share content at the team or folder level with other XBRUSH users by entering their email address.
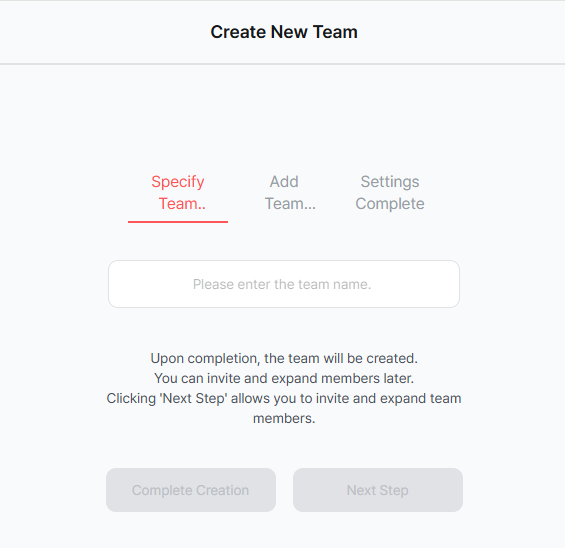
Creating a Team
Click the team name to open the team list — a "+ Create New" option appears at the bottom.
- Click the current team name in the left control panel to open the team list.
- Select + Create New at the bottom of the list.
Enter a name for the new team.
- Type the name for your new team in the input field.
The new team is created and selected.
- Confirm to create the team. It is immediately selected and appears in your team list.
Deleting a Team
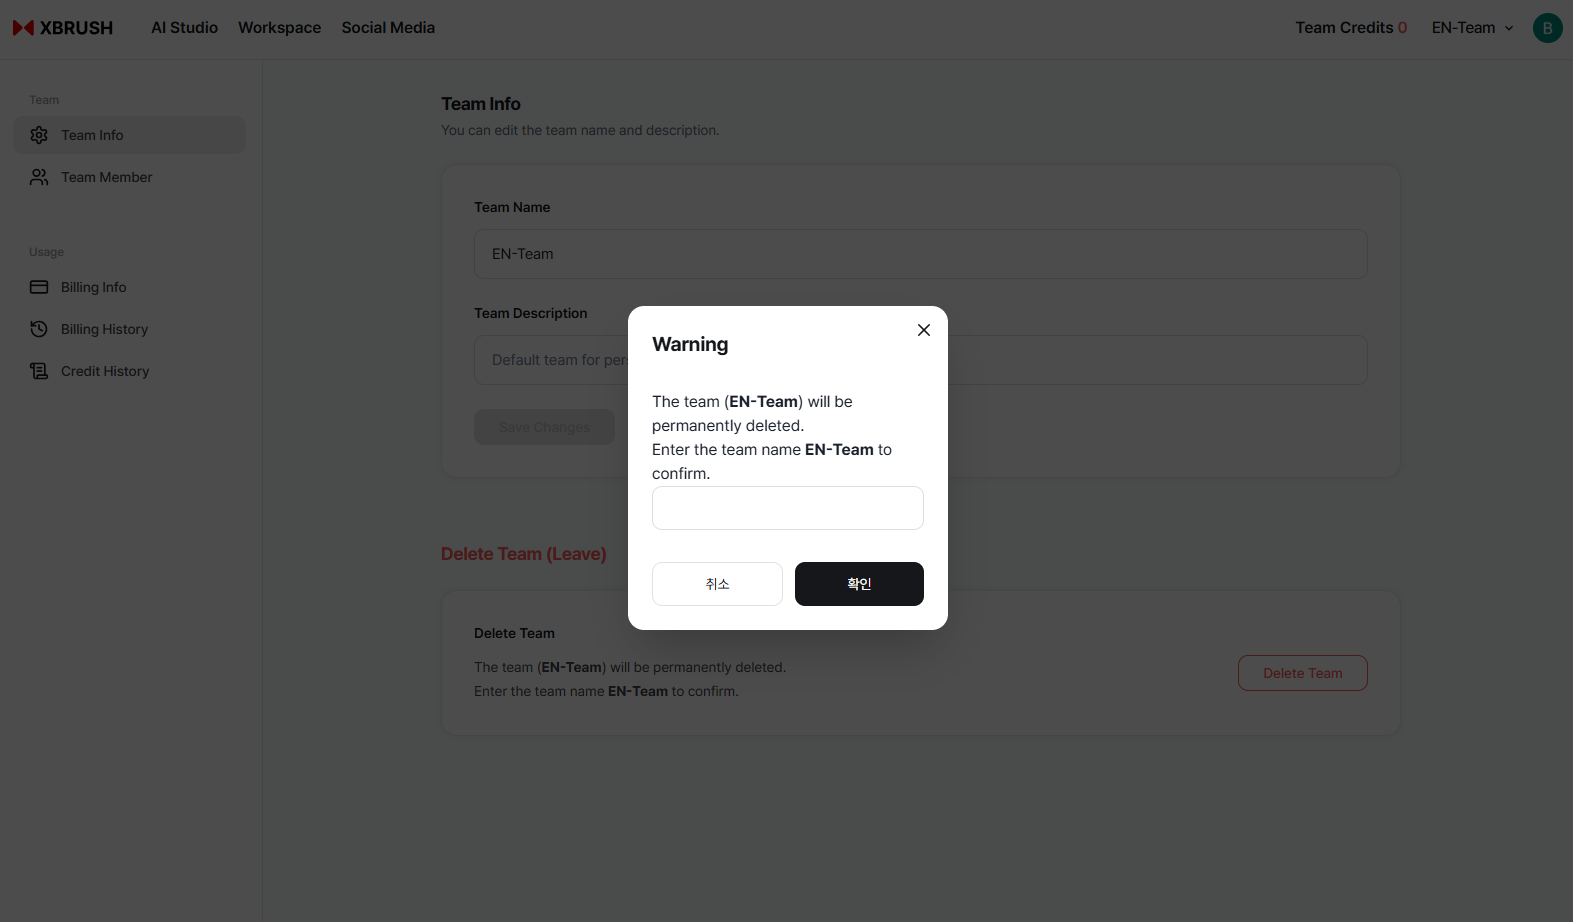
Deleting a team
- Click the trash icon to the right of the team name to delete the team.
Note: Only the team Owner can delete a team. Deleting a team permanently removes all its content and cannot be undone.
Team Settings
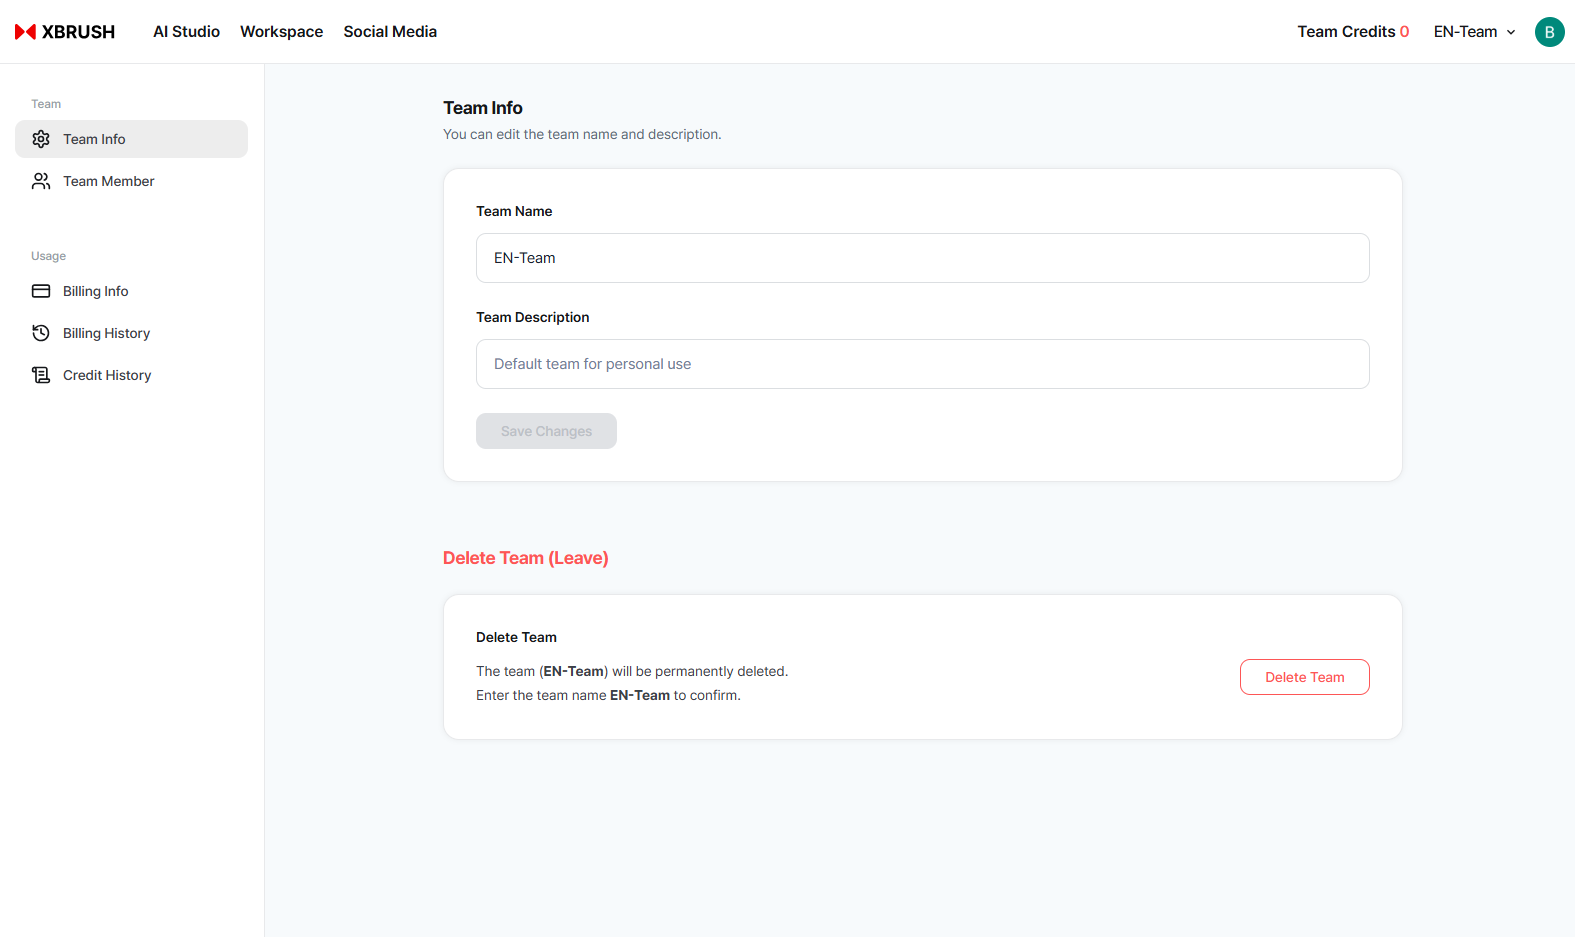
Team settings panel — manage members, roles, billing, and more.
The Team Settings panel is accessible from the team menu. From here you can manage members, change roles, update your subscription, redeem coupons, and purchase expansion packs.
Renaming a Team
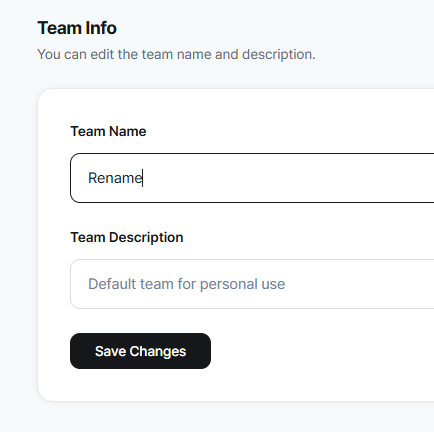
Click the team name in settings to edit it.
- Open Team Settings.
- Click the team name at the top of the settings panel.
- The name field becomes editable — type the new name.
- Press Enter or click outside the field to save.
Member Roles and Permissions
XBRUSH teams have four role levels. The team creator is automatically assigned the Owner role.
| Role | Manage Members | Manage Folders | Generate Content | View Content | Billing | Delete Team |
|---|---|---|---|---|---|---|
| Owner | ✅ | ✅ | ✅ | ✅ | ✅ | ✅ |
| Admin | ✅ | ✅ | ✅ | ✅ | ❌ | ❌ |
| Member | ❌ | ❌ | ✅ | ✅ | ❌ | ❌ |
| Viewer | ❌ | ❌ | ❌ | ✅ | ❌ | ❌ |
- Owner: Full control over the team. Can manage all settings, members, billing, and delete the team. Only one Owner per team.
- Admin: Can invite/remove members and change roles for Members and Viewers. Cannot delete the team or manage billing.
- Member: Can generate content and use team folders. Cannot manage members or settings.
- Viewer: Read-only access. Can view team content but cannot generate or edit.
Changing a Member's Role
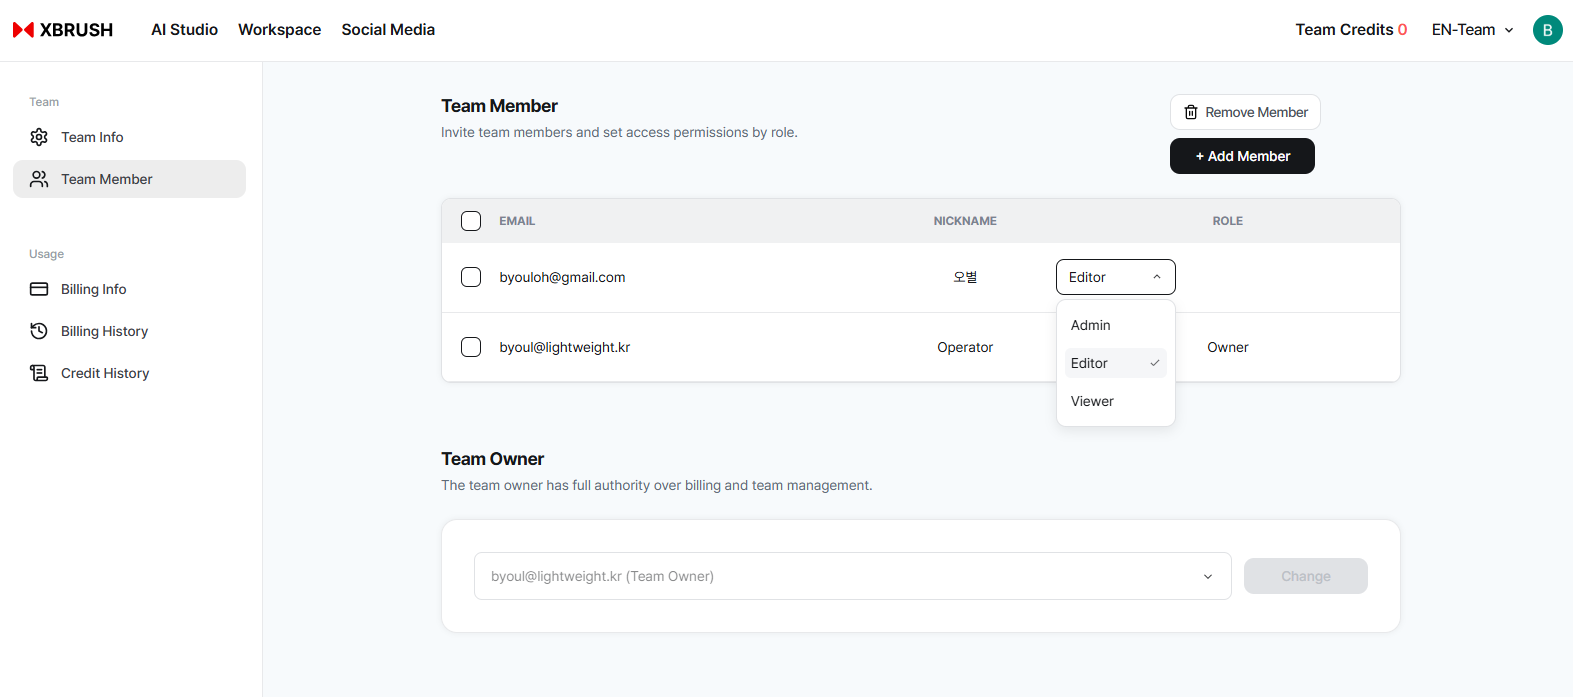
Changing a member's role
- In team settings, click the role label next to a member's name to open the role selector.
- Owners can change any member's role.
- Admins can change roles for Members and Viewers only.
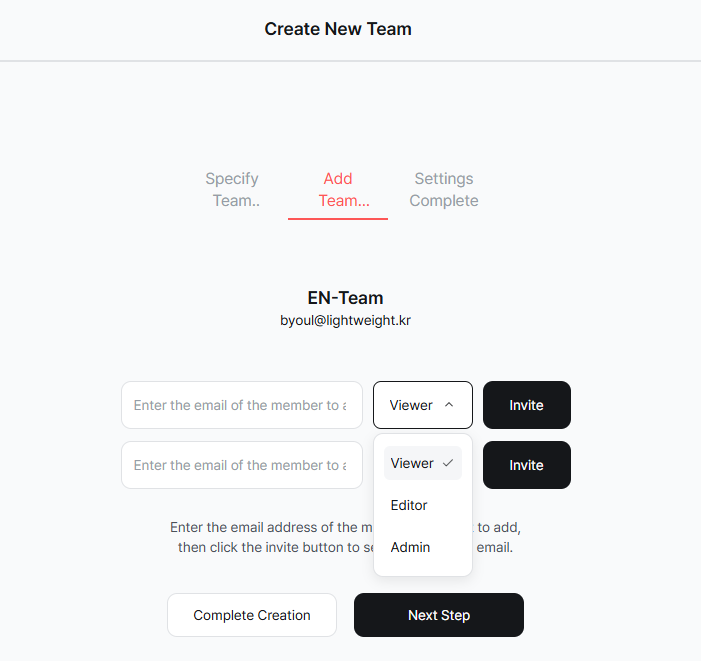
Adding Members
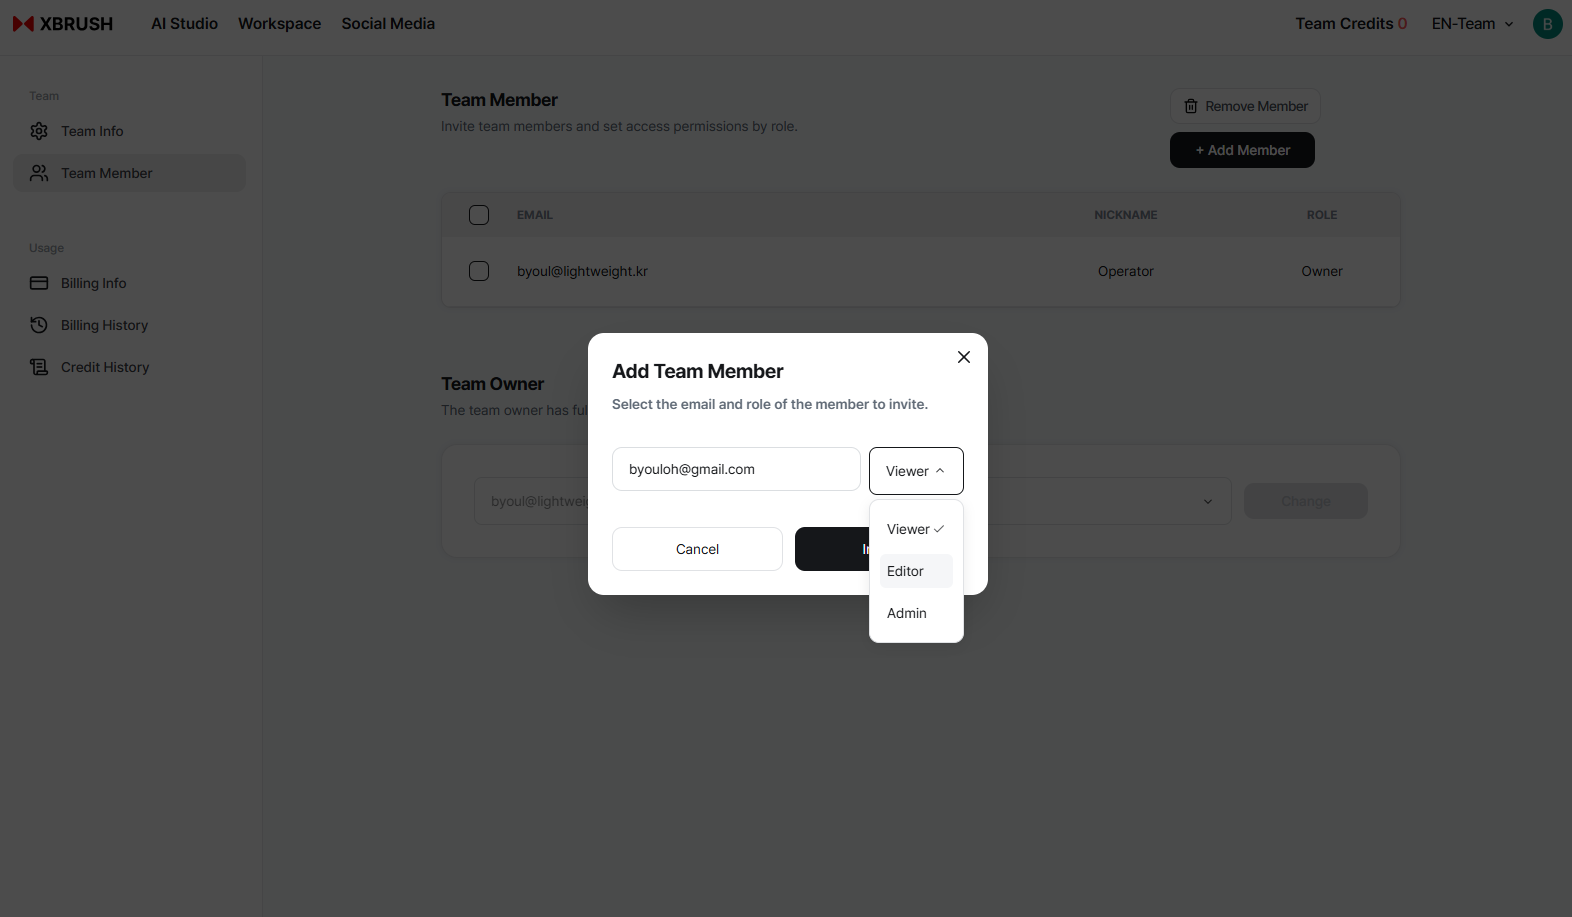
Enter the invitee's email address and select their role.
- Open Team Settings.
- Click Add Member (or the + invite button).
- Enter the email address of the XBRUSH user you want to invite.
- Select the role to assign: Admin, Member, or Viewer.
- Click Invite — the user receives an email invitation.
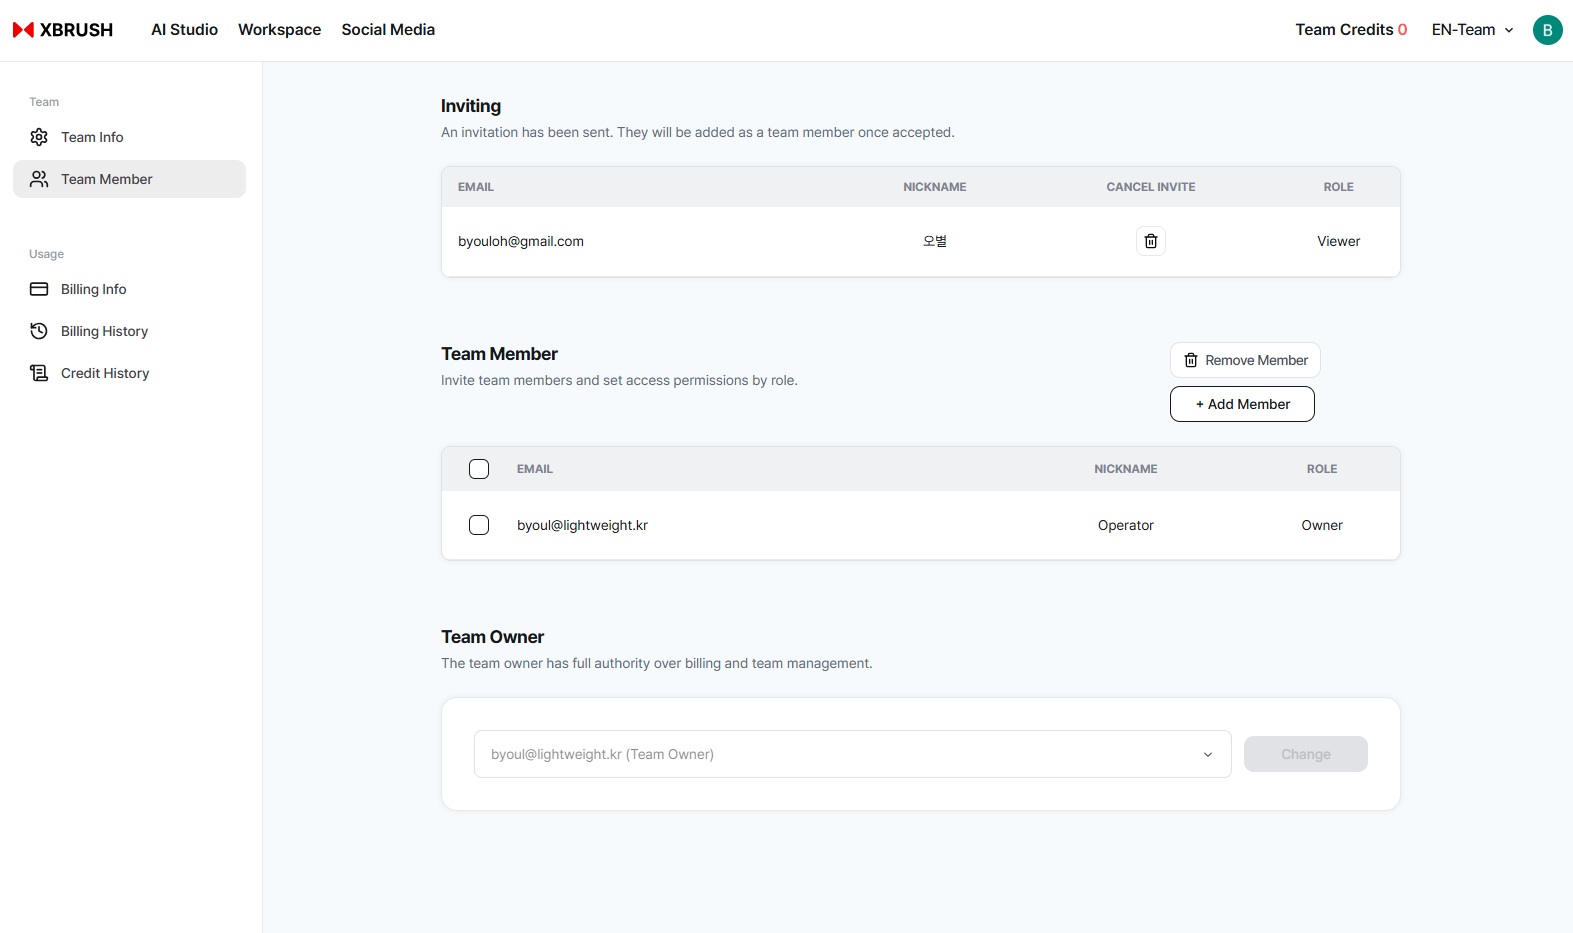
The invited member shows as Pending until they accept the invitation.
The invited member's status shows as Pending until they accept. Once accepted, they are added to the team with the assigned role.
Removing Members
- Open Team Settings.
- Find the member in the member list.
- Click the action menu (⋯) next to their name.
- Select Remove Member and confirm.
Removed members immediately lose access to the team and its content.
Using a Coupon
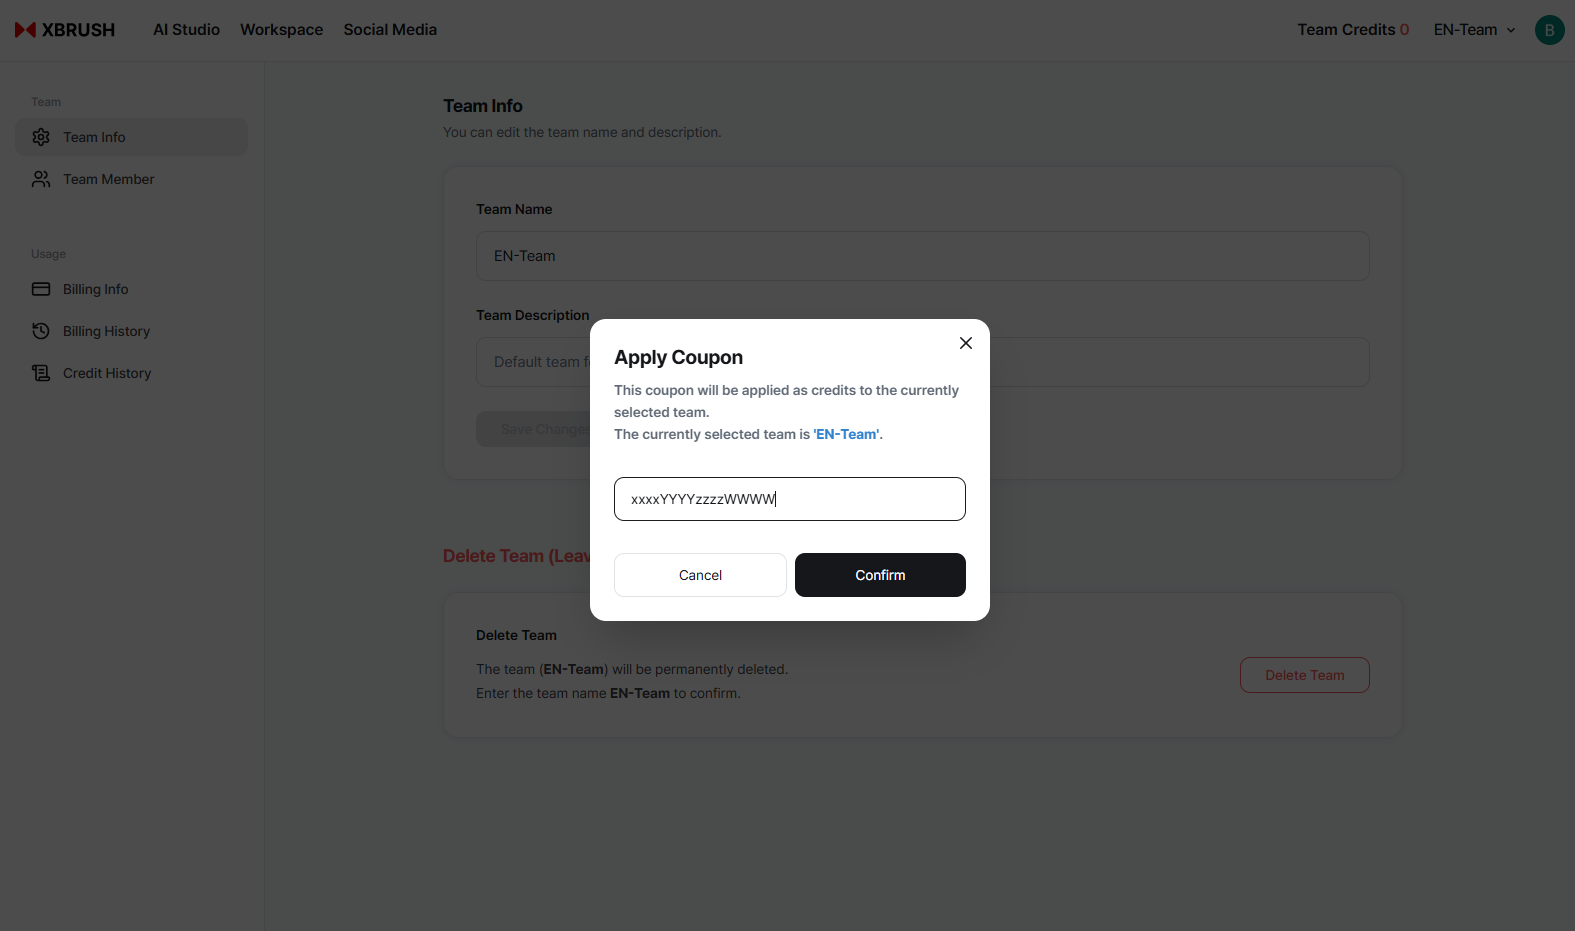
Coupon redemption
Changing Your Subscription
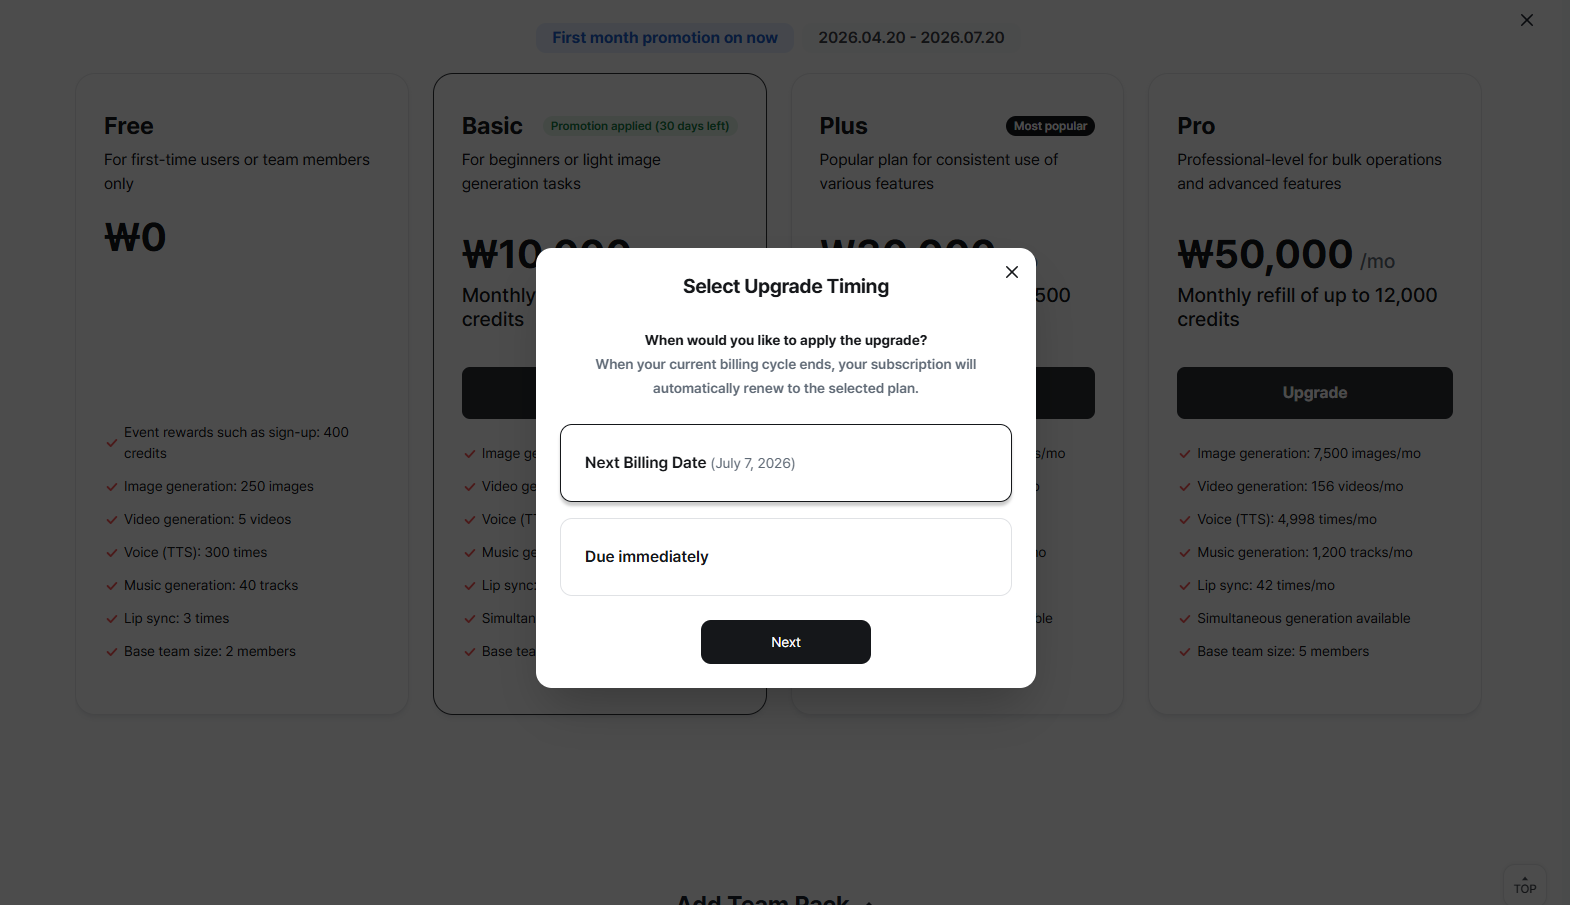
Changing your subscription
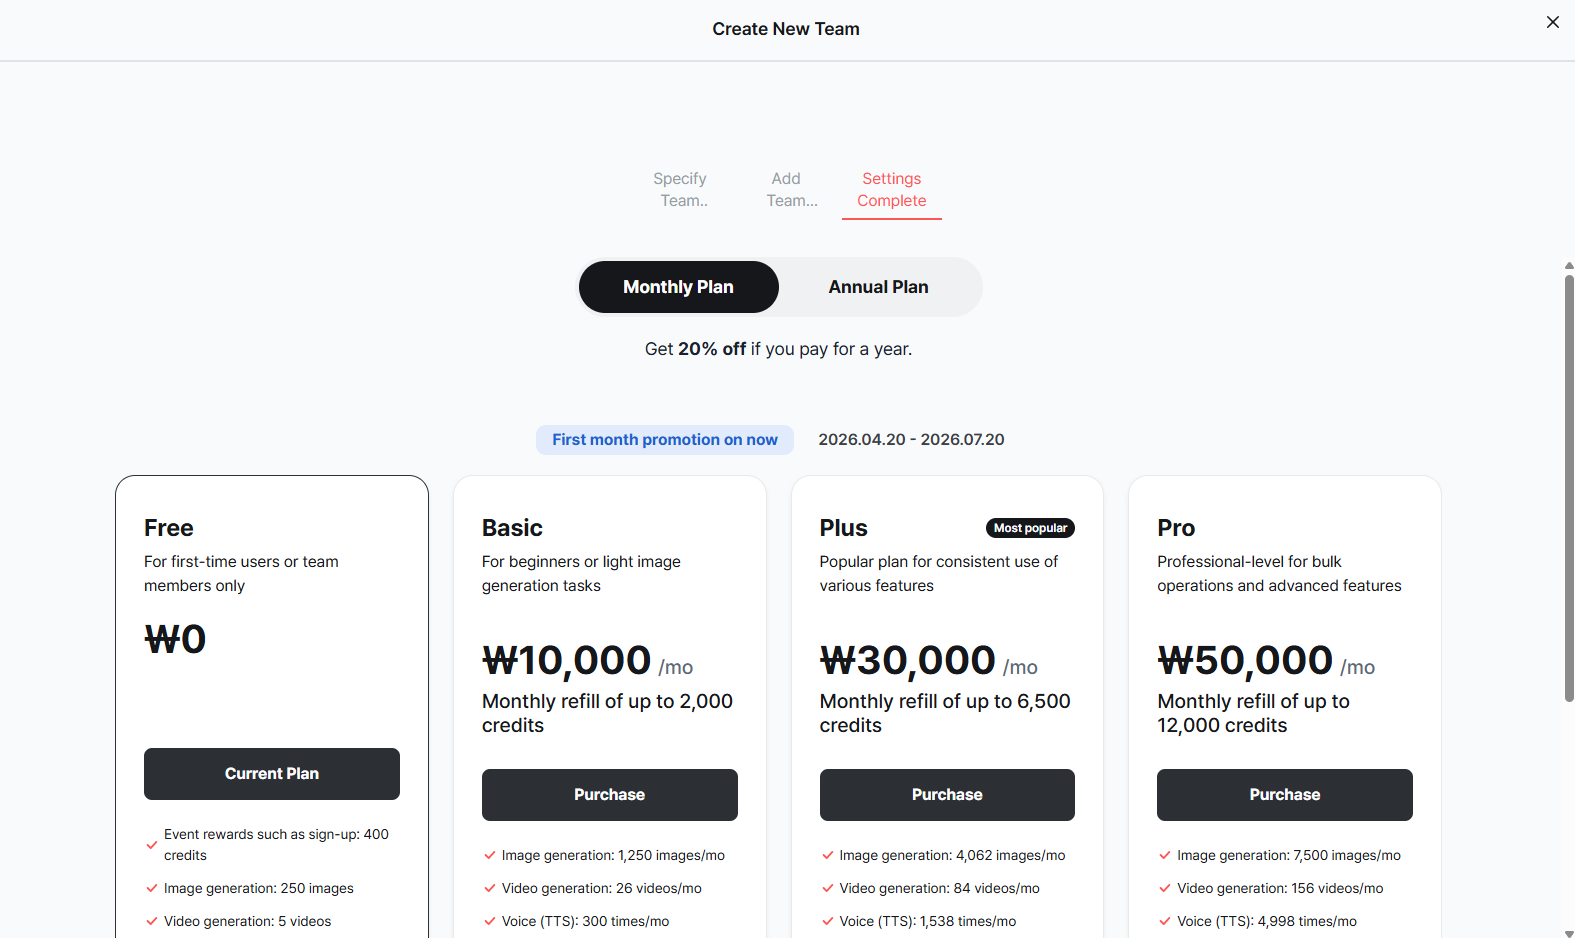
Expansion Packs
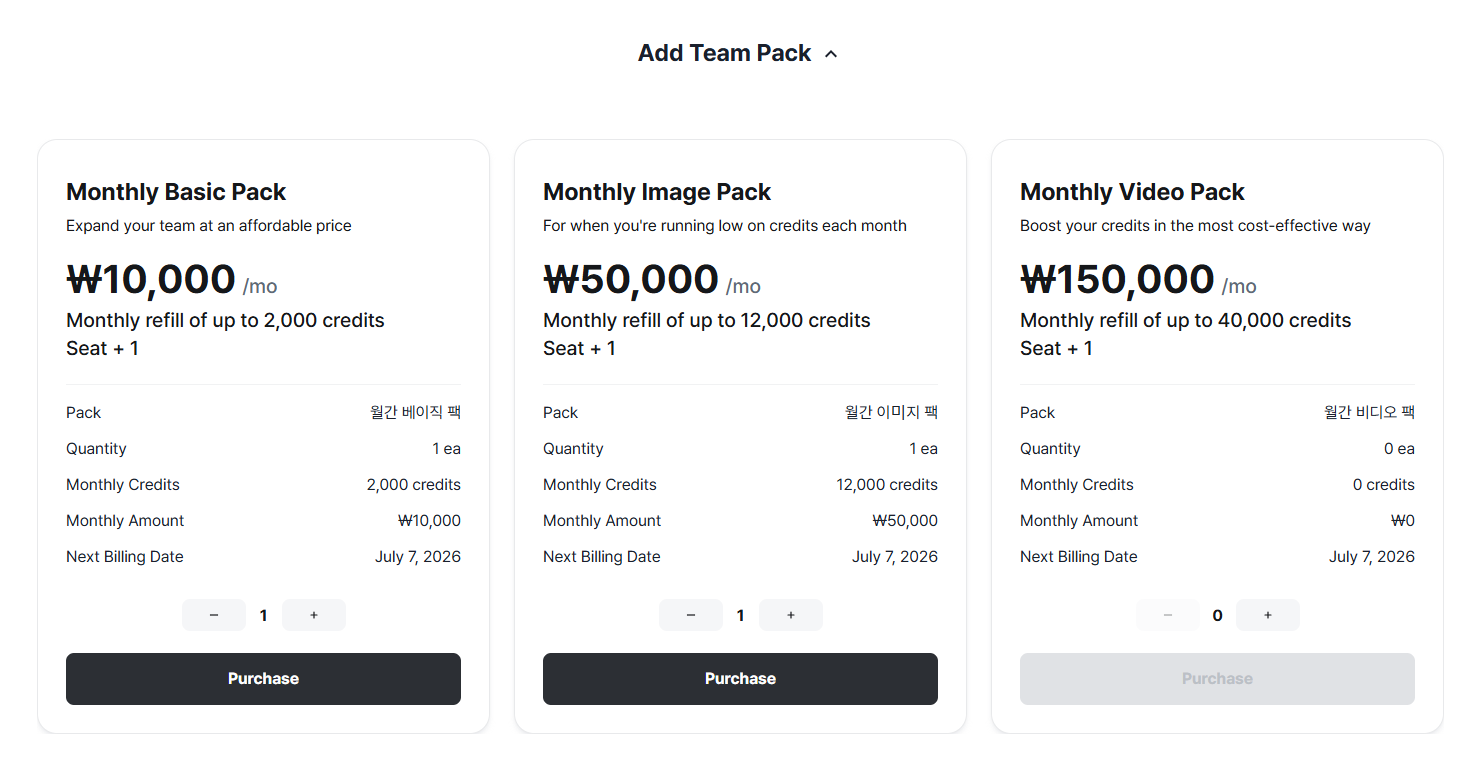
Expansion packs
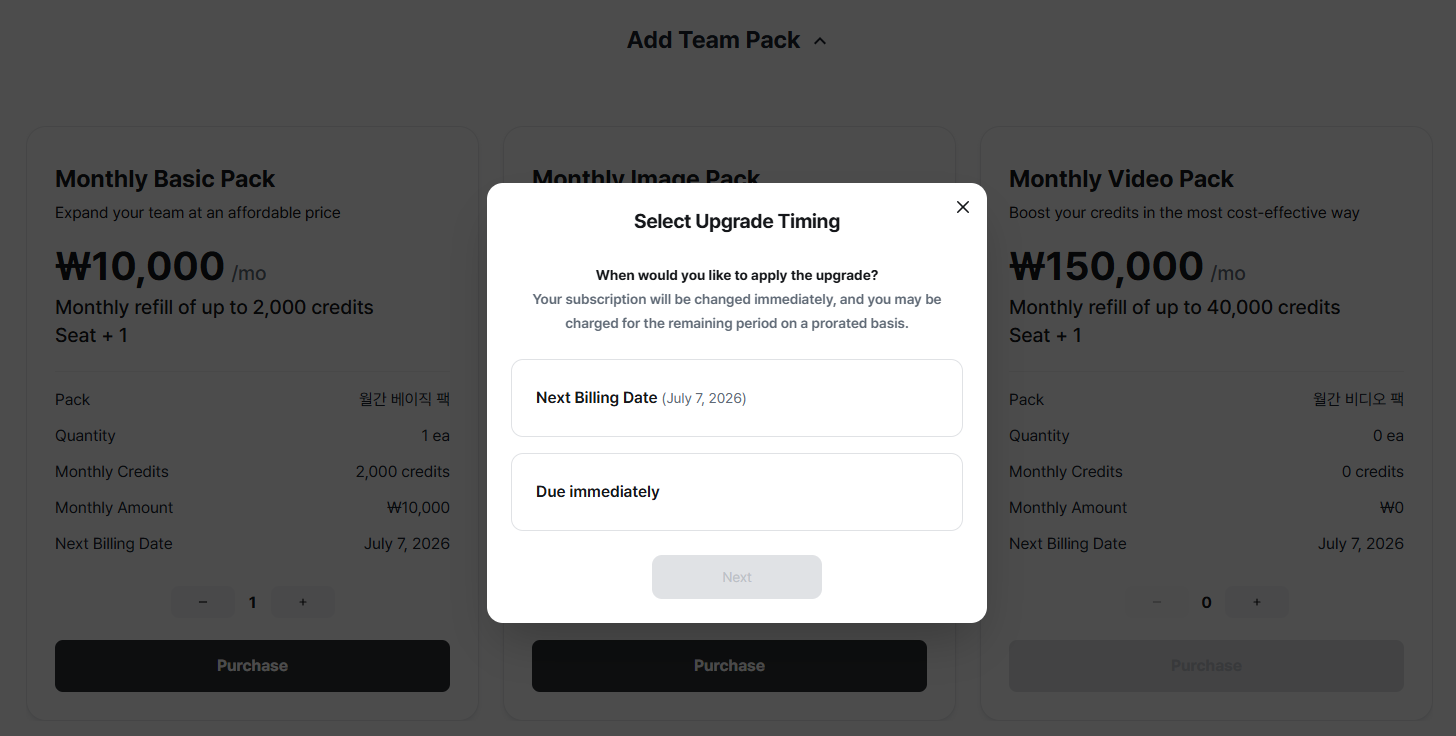
Purchasing expansion packs
Billing Info
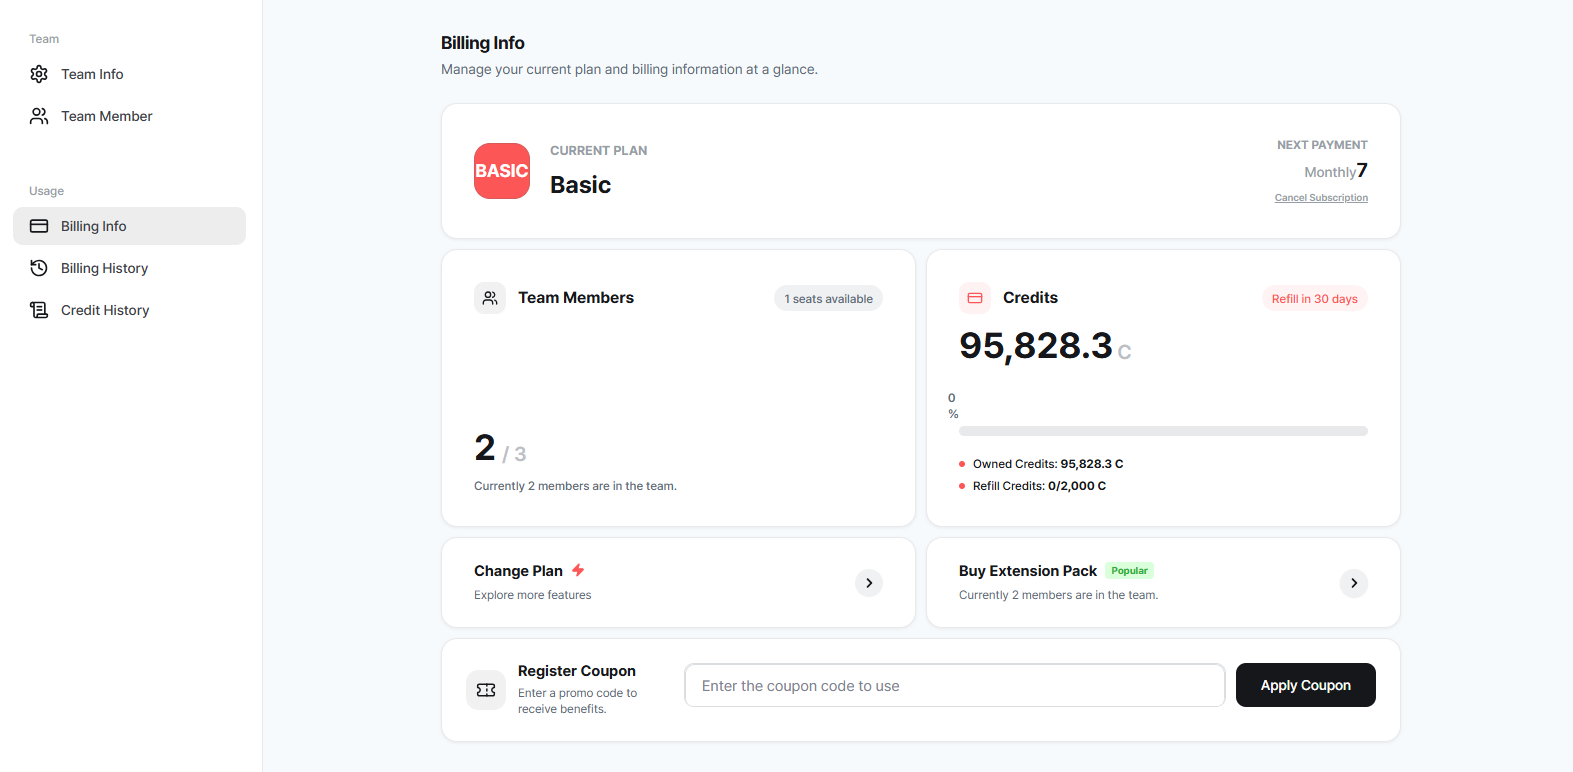
Billing info
Billing History
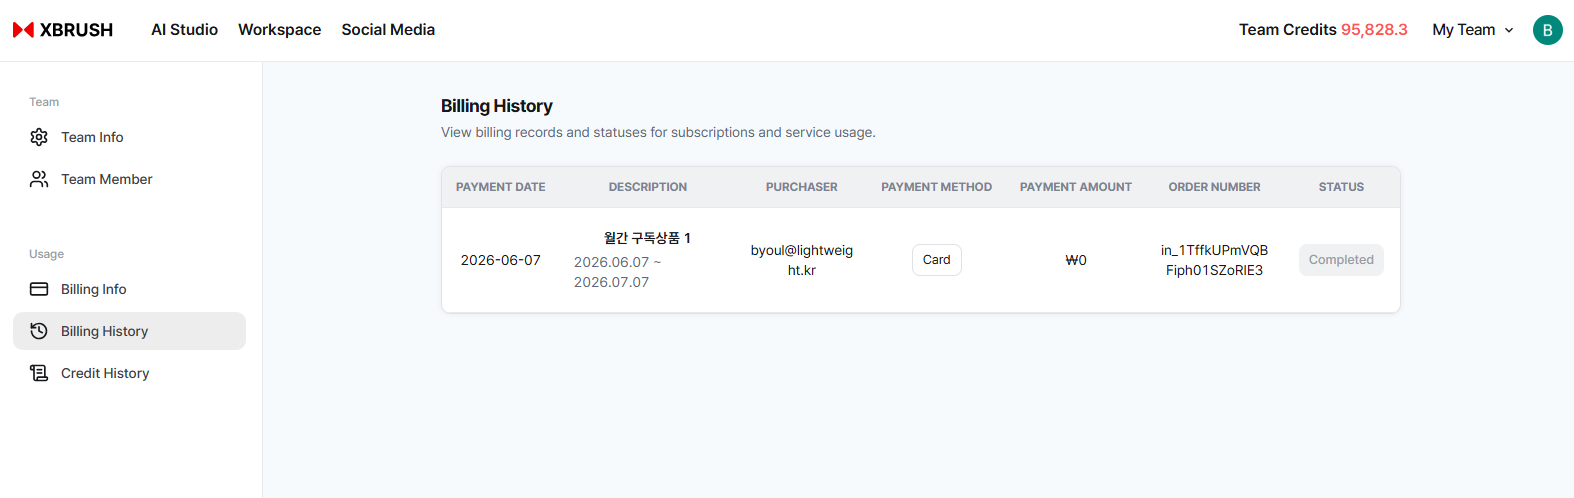
Billing history
Credit History
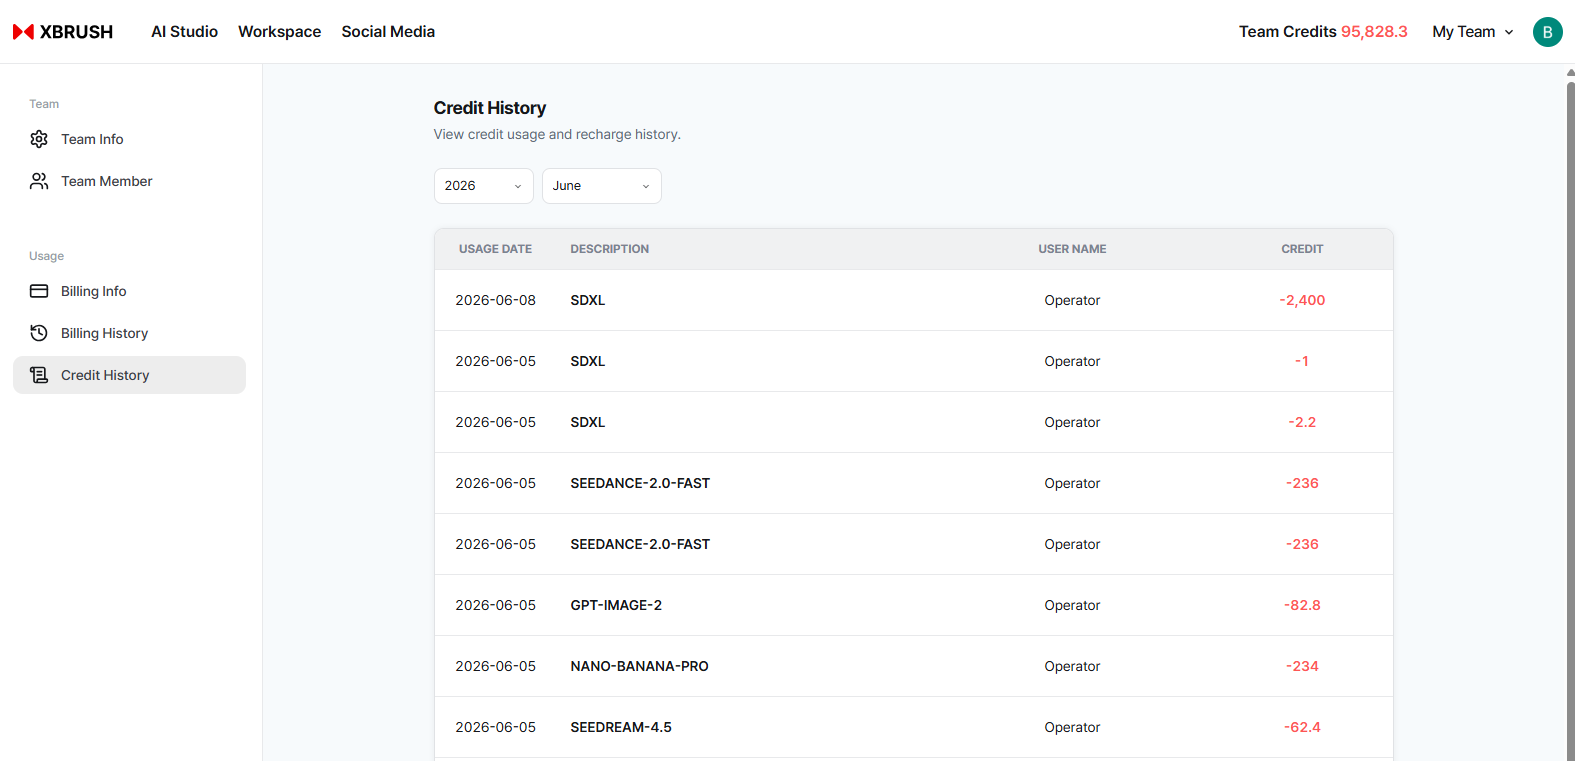
Credit history
Task Comments
Members can leave comments on individual generation tasks within the team workspace. This is useful for providing feedback or notes on specific outputs without leaving the platform.
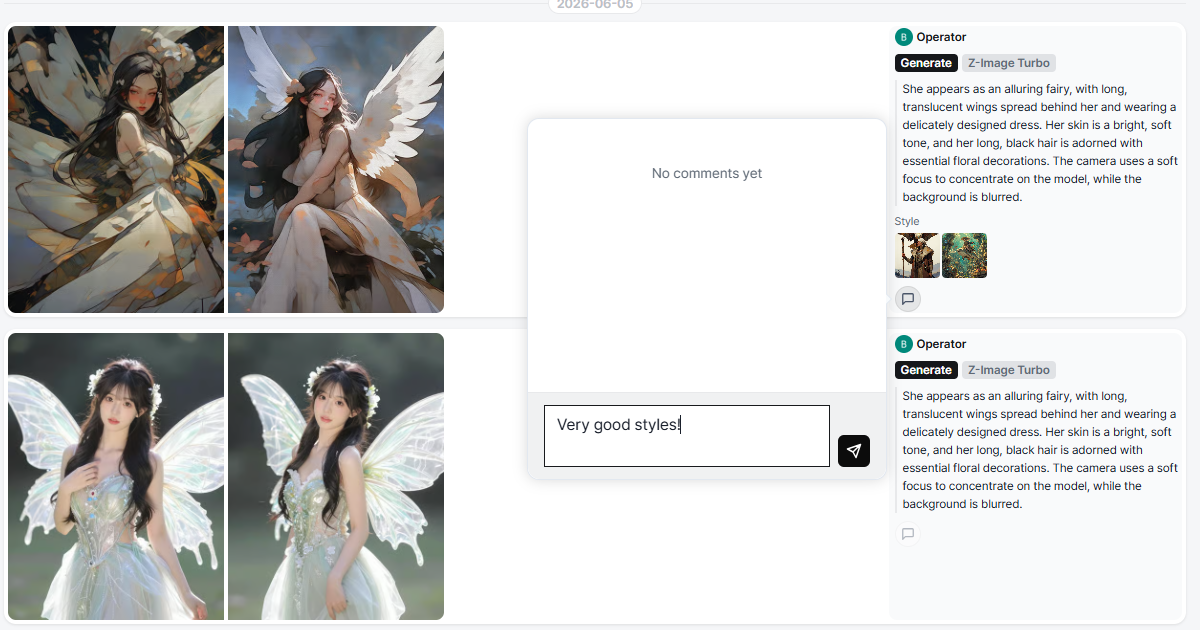
Leaving a comment on a task
- Click on any task in the team results feed to open the detail view.
- Click the comment icon or the "Add Comment" field at the bottom of the task detail.
- Type your comment and press Enter to post.
- All team members can view and reply to comments on shared tasks.